...
| Expand |
|---|
|
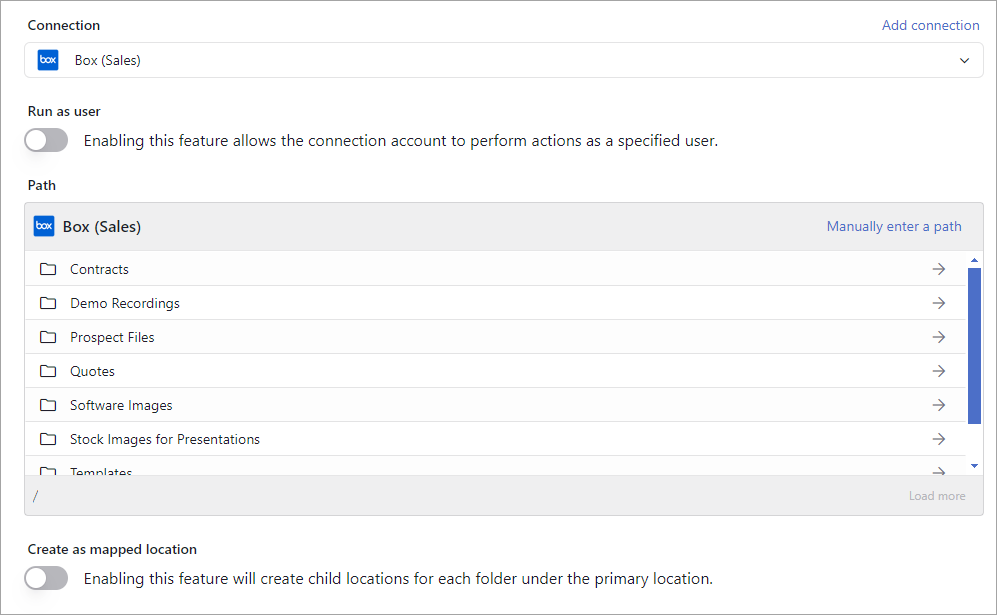
Verify Scan location is selected. The Connection list displays all connections created in the application. Initially, it displays the first 100 50 connections. If you have more than 100 connections, use the Load more link to display additional connections as needed. Select the connection for the scan you are creating. (If the connection you want to use does not already exist, you can use the Add connection link above the list to create a new connection.) If impersonation is available for the connection, a Run as User toggle displays. Impersonation allows a site admin access to all the folders on the platform, including those that belong to other users. Turn on this toggle if you want to use impersonation and then select the user you want to access. A window displays all the directories on the selected connection. Select the directory you want to use. Click the Load More link to load additional directories in the list as needed. You can drill into each directory by selecting the right arrow that displays when you hover on the directory name. You can also manually specify the path to use.
 The Create as mapped location toggle allows you to create the location as a mapped location. When DryvIQ scans this location, it creates individual child scans for every folder in this directory. All scans are managed at the child scan level. See Child Scans for more information about managing these scans. Click Next to advance to the Discover Categories step.
|
| Expand |
|---|
|
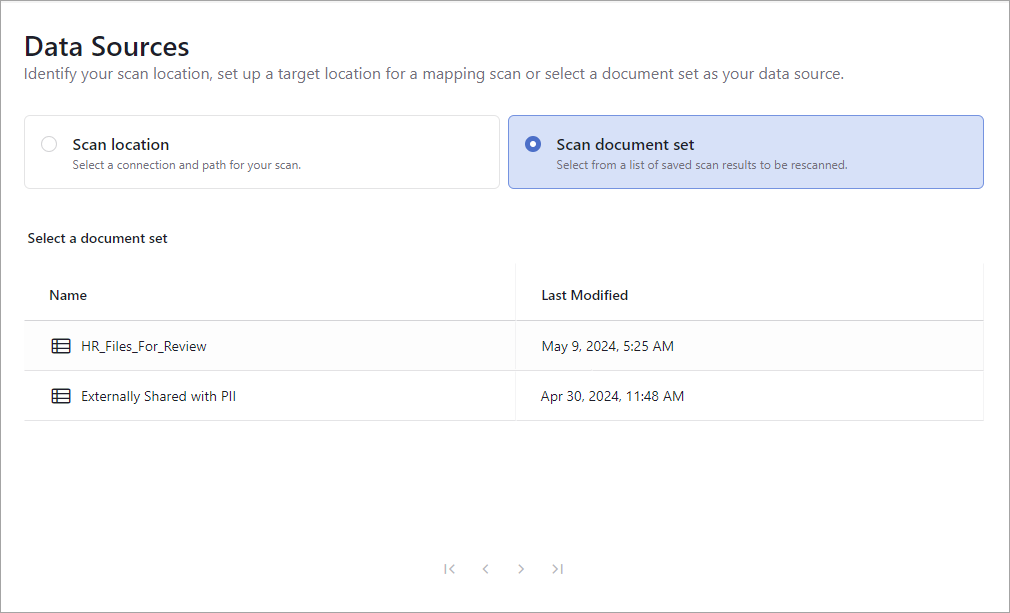
Select Scan Document set. Select the document set from the list of available document sets that displays.
 Click Next to advance to the Discover Categories step.
| Info |
|---|
Document sets that have been assigned to an intelligent migration will not be available in the list to select to be used for a Discover scan. |
|
...
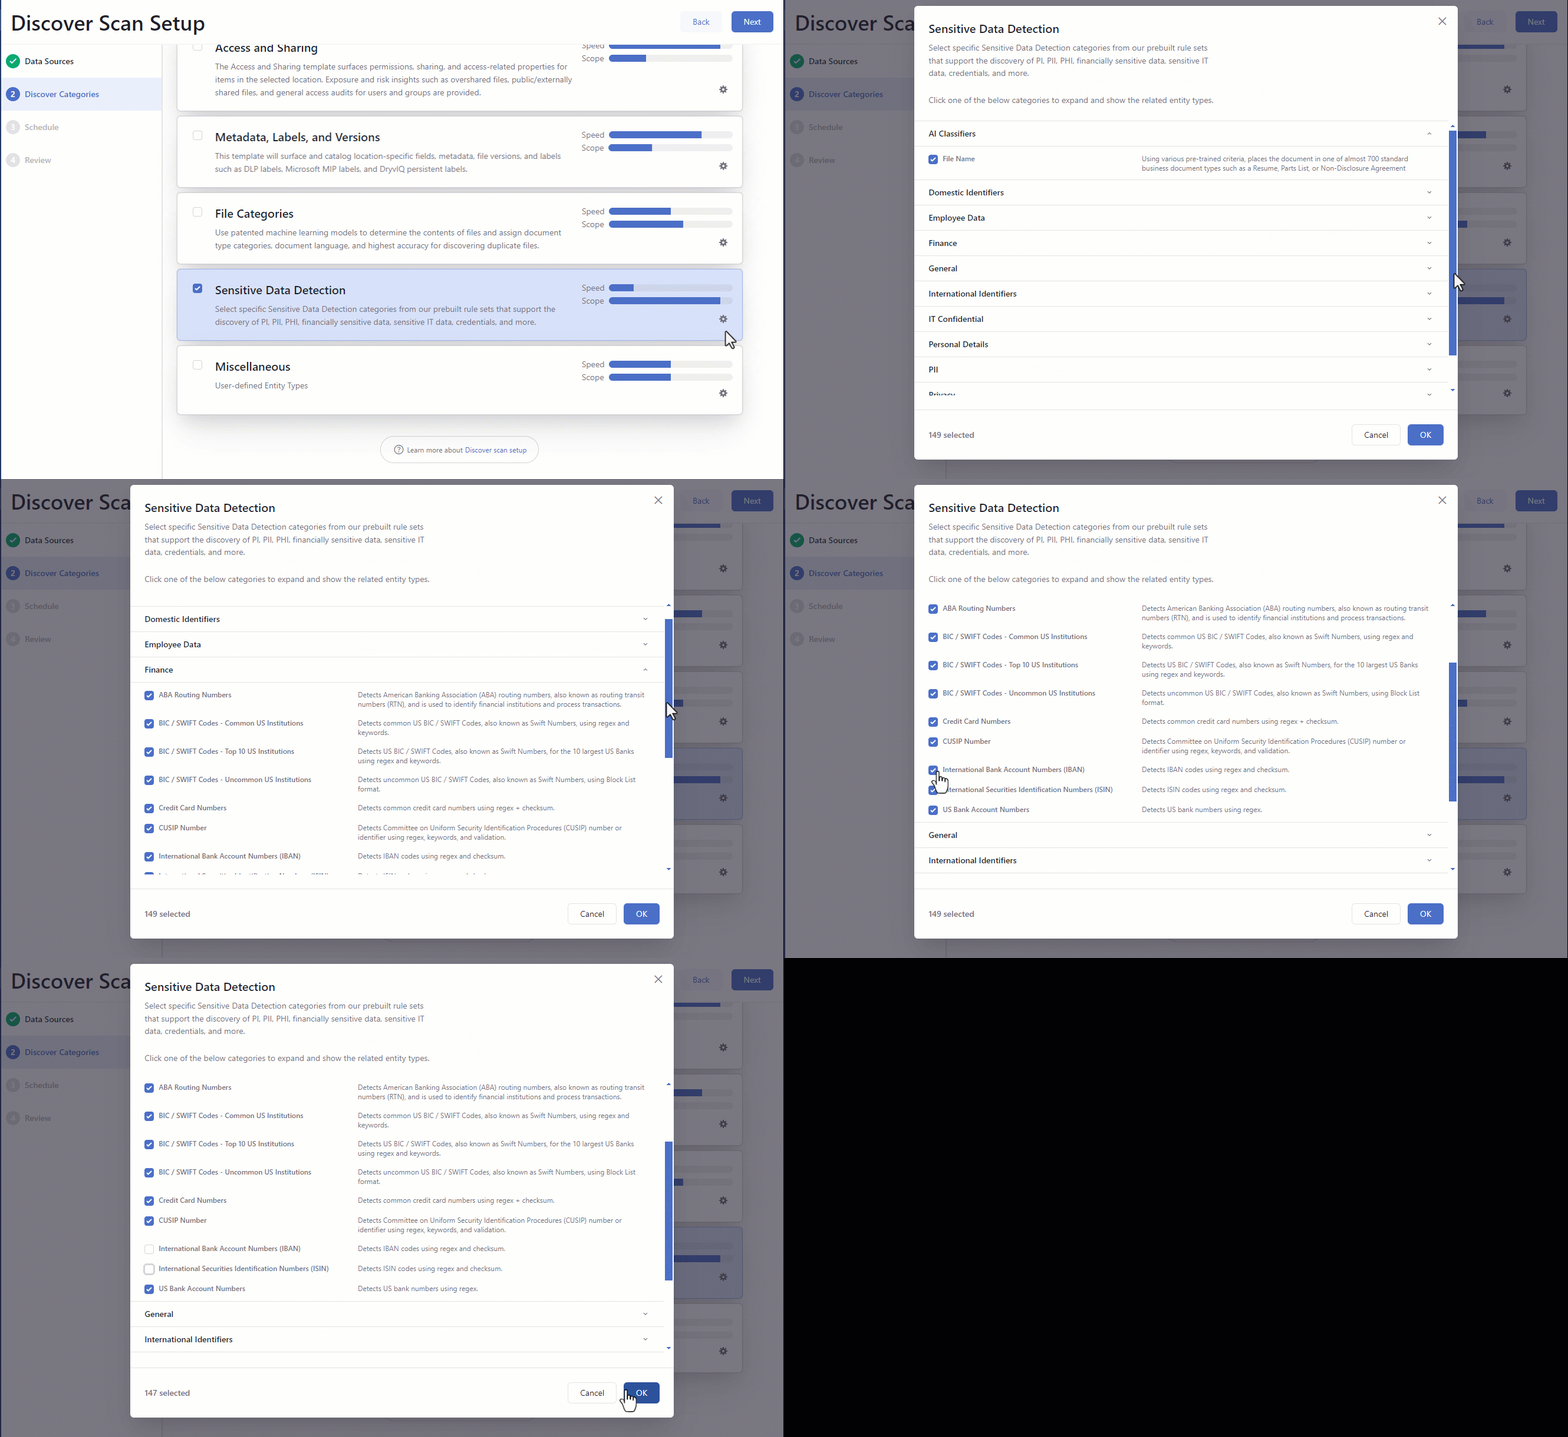
Click to select the box in front of the template name. A check mark appear in the box to indicate it is selected.

Selecting a template selects all available categories in that template. DryvIQ recommends leaving the default categories for each template. However, if your use case requires a specific set of categories, you can edit the template categories as needed. The exception is the File Inventory template, which cannot be edited. To edit a template, click the gear icon on the template card.
The corresponding modal opens and displays the categories for the selected template. Expand a category to view the included entity types. Clear the box for an entity type you do not want to include in the template.
Click OK when you are finished adjusting the categories.

Repeat steps 1-4 for each template you want to select.
Click Next to advance to the Schedule step.
If you selected more than one template, you will receive a warning that selecting multiple templates may impact your scan speed. Click Cancel to edit your selections or OK to continue with the current selections.
 Image Added
...
Settings
The Settings step allows you to customize the scan by adding filters based on path, file type, files size, etc. You can even specify how much of a file gets scanned and enable optical character recognition (OCR) if you want PDFs and images to be scanned for text. There are even advanced options to ignore hidden and shared items to improve scan results.
...


