On This Page
Overview
You can add a Discover scan using the Add scan button on the top of the Scans page. This opens the Discover Scan Setup. You will simply work your way through the Discover scan setup wizard to configure the scan. This includes specifying the location you want to scan, selecting the templates you want the scan to use, and designating the schedule for the scan.
Data Source
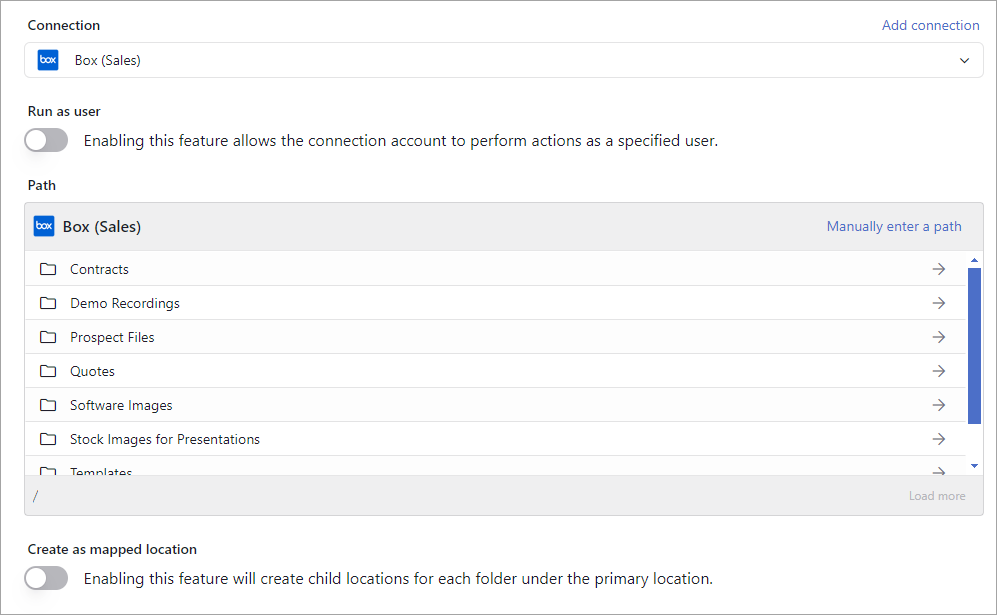
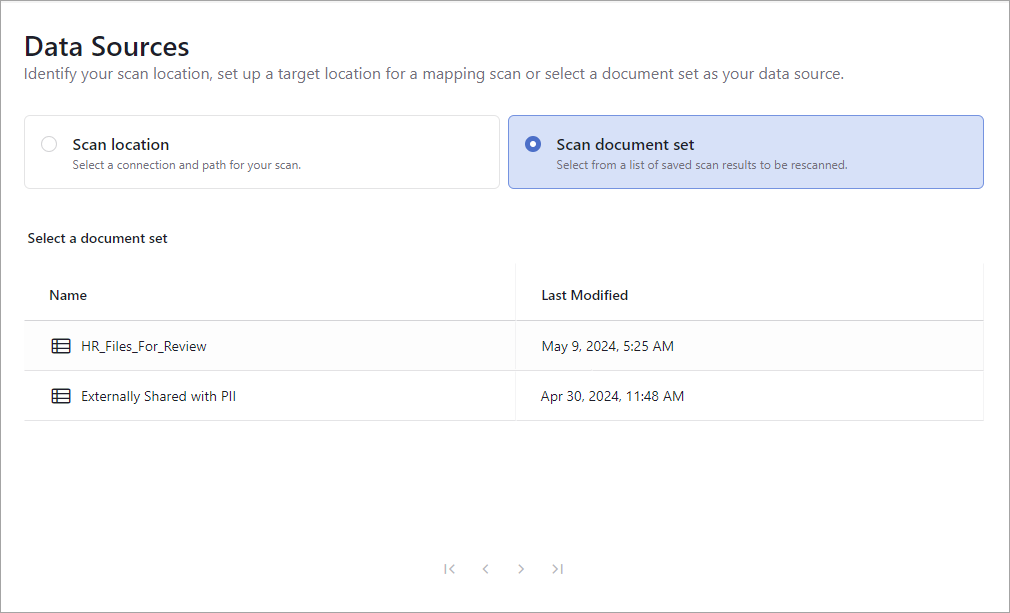
The first step is in the Discover Scan Setup is to select if you will be using a location or document set for the scan. A location allows you to select a connection and path to scan. A document set allows you to select a saved scan result to rescan. Expand the section below based on the option you want to select to view the instructions.
Discover Categories
This step allows you to select the standard templates you want to add to the Discover scan. For locations, File Inventory is always included in the Discover scan and cannot be turned off. However, you can choose to add additional categories to the scan to meet your needs. For document sets, File Inventory will not be included in the scan since all the items in the document set will already have been run against the File Inventory template, and scanning them against it again would be redundant.
Each template provides a speed and scope key to help you understand the depth of analysis the template provides and how that will impact the speed of the Discover scan. Deeper scans will run slower but reveal more information or refined classifications. Keep this in mind when building your scan.
If a category is unavailable for selecting, the supporting entity type is not installed in your DryvIQ Platform.
The Miscellaneous category contains all the custom entity types created in your DryvIQ Platform. If you want to add a custom entity type to the Discover scan, you should add this template to the scan. You can then use the configuration option for the Miscellaneous template to select just the specific custom entity type that you want to add to the scan you are creating.
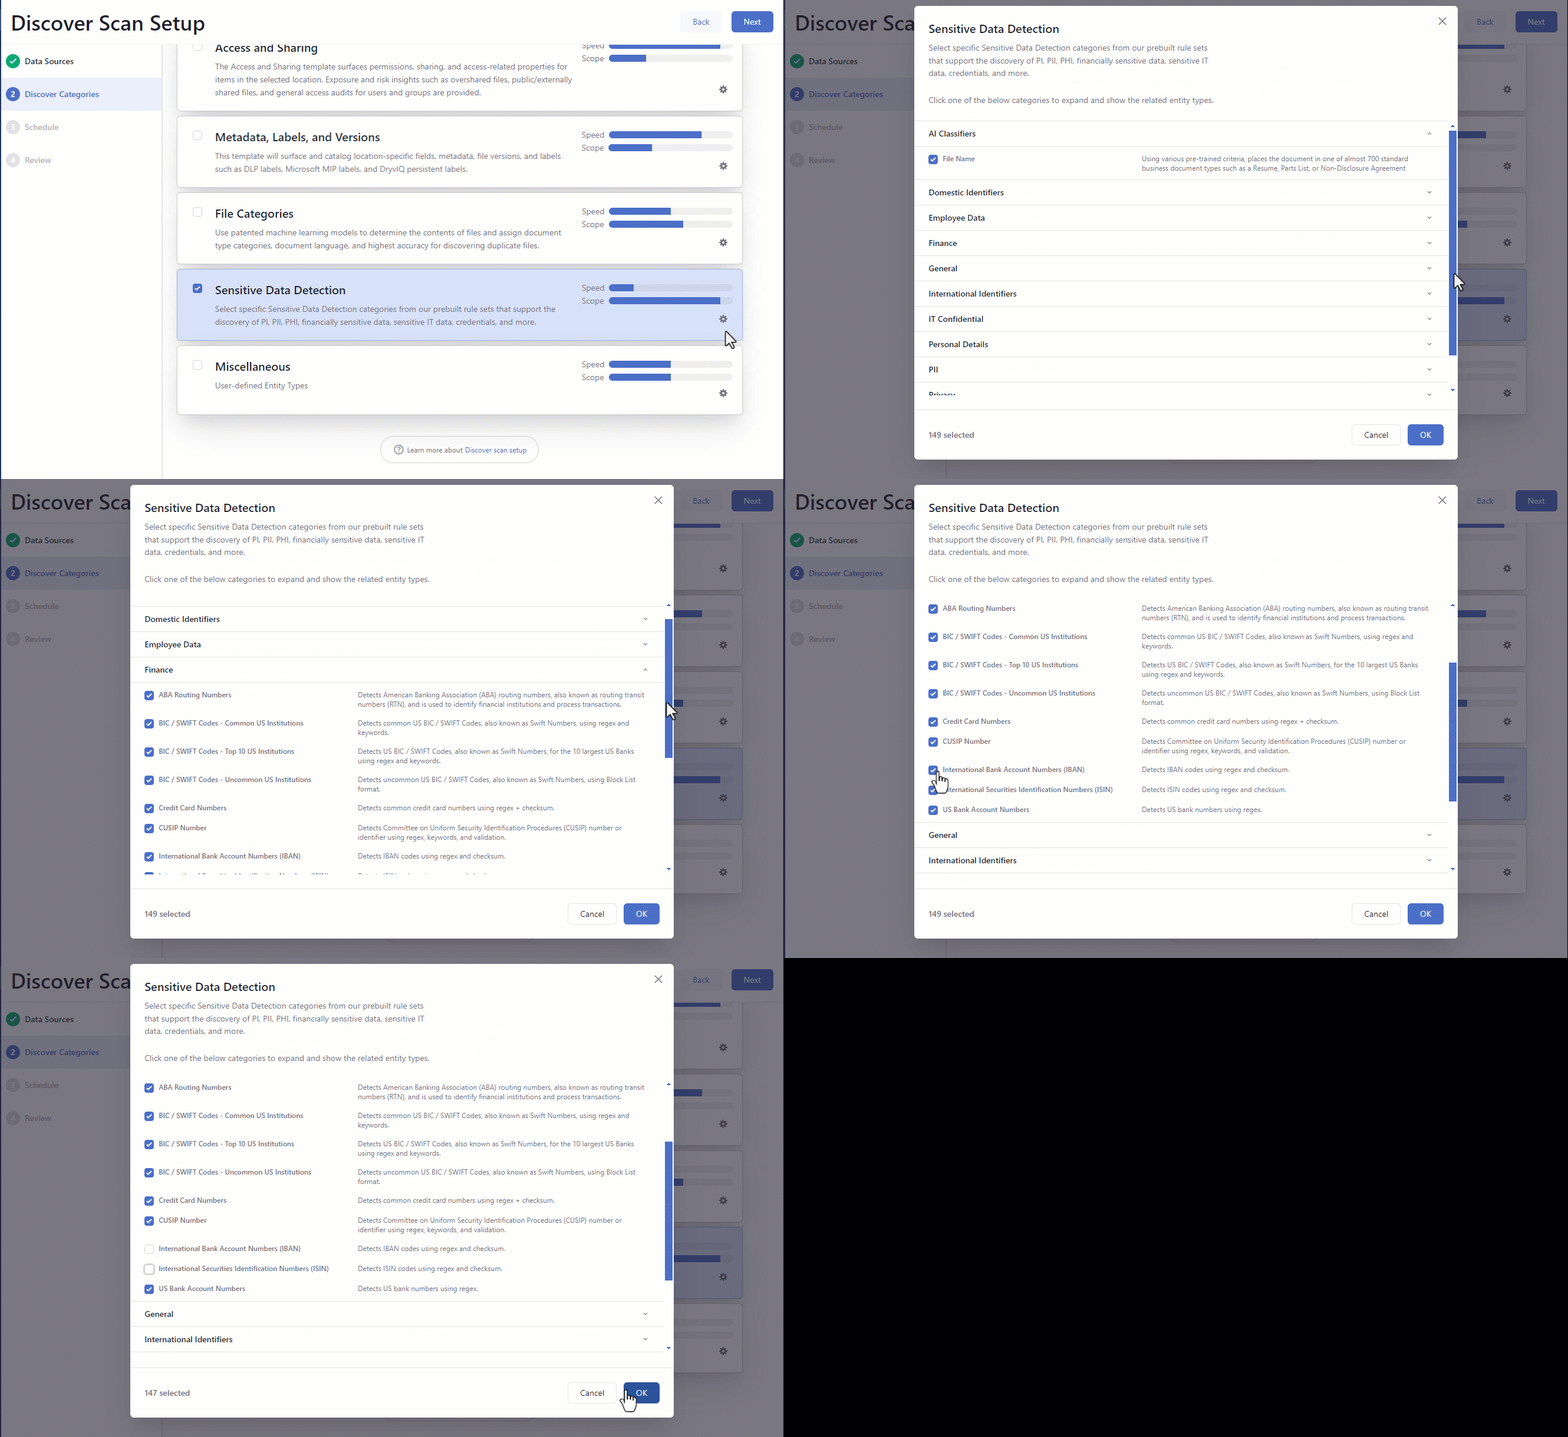
Click to select the box in front of the template name. A check mark appear in the box to indicate it is selected.
Selecting a template selects all available categories in that template. DryvIQ recommends leaving the default categories for each template. However, if your use case requires a specific set of categories, you can edit the template categories as needed. The exception is the File Inventory template, which cannot be edited. To edit a template, click the gear icon on the template card.
The corresponding modal opens and displays the categories for the selected template. Expand a category to view the included entity types. Clear the box for an entity type you do not want to include in the template.
Click OK when you are finished adjusting the categories.
Repeat steps 1-4 for each template you want to select.
Click Next to advance to the Schedule step.
Schedule
The Schedule step allows you to assign a schedule to the scan. If no schedule is assigned, the scan must be run manually. If enabled, the scan will run automatically based on the defined schedule. There are multiple settings available to customize the scan schedule.
If you are creating a scan for a mapped location or document set, the schedule applies to the child scans only. The scan for the primary scan will run every six hours and create new child scans as needed.
Select the Enable schedule.
Complete the schedule fields based on the schedule you want to use. Expand the Scan Schedule Options below to learn about each schedule option.
Click Next to advance to the Review step.
Review
The Review page displays all the configuration options selected for the scan so you can review the settings and make edits as needed. You will also assign a name to your scan on this page, which is a required step before saving the scan.
Type the name you want to assign the scan in the Name field and click Done to save the name.
For document sets, the selected document set will be renamed with the scan name entered here and will be locked from further editing. The new name will be displayed on the Document sets tab in the Results saved views.The rest of the page displays the configurations selected for each step of the Discover Scan Setup. Review the information. If you want to change anything, click Edit next to the section heading (or click the heading in the menu on the left).
This will take you back to the corresponding page so you can make the necessary edits. Click Next to advance through the remaining setup pages or click Review in the left menu to return to the Review page.
Once you are finished reviewing the scan setup, click Save. You are presented with two options:
Save scan: This saves the scan with no further action. The scan will follow the schedule that has been set. If no schedule has been set, the scan must be triggered manually.
Note that the primary scan for mapped locations and document sets will run as soon as the scan is saved to create the child scans. However, the child scans will not run once the primary scan is complete. The child scans will run according to the schedule set for the scan. If no schedule has been set, the scans will need to be run manually.Save scan and run it now: This saves the scan and triggers the scan to run. Once complete, the scan will then follow the schedule that has been set for the scan. If no schedule has been set, subsequent scans must be triggered manually.
The scan is added to the All Scans page.


